
Paula Explains: Infused Baking
While edibles are the preferred way of consuming for many people, the legal recreational market’s restrictions on how much THC can be in a product means that, if you need more than that 10 mg, it can get fairly pricey. That’s where homemade edibles come in clutch.
For those of you who shop with us, you’ve almost certainly been served by Paula, one of the lovely Budtenders on our team. Among her many talents, Paula is an accomplished baker, having graduated from Algonquin College with her certification in Culinary Arts. Many of us on the team have benefited from Paula’s tips when it comes to infusing various treats (and benefited ever more from sampling her homebaking!) So we asked her to share her wisdom, and she has been generous enough to write down some of those tips and share two of her go-to no-bake infused sweet treats!

“I am definitely one of those people who needs more than 10 mg to feel high, so if an edible is what I’m looking for I usually make my own. With my background in baking I’m hoping I can help you navigate your DIY edibles from bud or even some of the oils we have available in the shop! I’m going to show you two simple, no-bake recipes, one using infused butter and one using a pre-dosed oil.”
So, let’s get started!
We’re going to start with infusing your own butter (or favourite carrier oil) with bud.
You will need:
Instapot or Crockpot (plus the rack insert)
Mason Jars with lids
Oil base (butter, coconut oil, olive oil, etc.)
Bud (How much will depend on how potent you want your oil - we’ll get to that!)
Scale
Grinder or scissors
Strainer
Cheese cloth
Spatula
Oven mitts
Storage container for final product
Because I have a higher tolerance, I usually do a 1:1 ratio for carrier oil and bud. This means I use 1 cup of oil to 1 oz. of bud. You can adjust that ratio to your tolerance. You can use 14g of bud to 1 cup of oil for less potency, or even 7g to ½ cup of oil if 1 cup seems like too much. Once you decide what ratio to use, it's time to start the actual infusing.
Weigh your bud on the scale and use your grinder or scissors to roughly grind/chop it up. It does not need to be finely ground. Alternatively, take advantage of some of the premilled options on the market, saving yourself some time at the grinding step!
Now that your bud’s all ground, we’re onto the step: decarboxylating.
This is the first and most important step when infusing so don’t skip it! Decarbing is the process of heating up your bud in order to activate the acid forms of THC/CBD (THCA/CBDA). Without this important step, the cannabinoids present in the cannabis you are using to infuse your butter/oil will not be bioavailable to you.
Place your ground bud in the mason jar and hand tighten the lid. Place your mason jar in the Instapot on top of the insert rack.
Now, fill the Instapot with water. You’ll want to fill it until the water covers the bud that's in the mason jar, but not so much that the jar starts to float.
Seal it all in the pot with the lid, and make sure the nozzle is set to seal.
Set your instapot to manual high pressure for 40 minutes. Once that 40 minutes is done, let the instapot sit for 10 minutes and then do a quick release. Pro Tip! You can take your instapot outside to do the quick release. This way your home doesn’t smell too much like bud.
And that’s it for decarbing!
Now for the actual infusion:
I find equal and reliable dosing seems to be the hardest to maintain when baking homemade edibles. I personally use Emily Kyle Nutrition Dosage as it is the most reliable I have come across. You just fill in the blanks, like the amount of bud you used, THC/CBD percentage, what fat/oil you used, and how much. The calculator will give you your dose per serving size.
Take your mason jar out of the instapot. Use your oven mitts because the jar will be very hot!
Add your carrier oil to the decarbed bud in the mason jars. You may want to melt your carrier oil if it’s something thick like butter so that it's easier to pour into your mason jar.
Place the lid back on the jar, hand-tighten, and place back on the rack in the instapot. You may need to add some more water in the pot as some may have evaporated during the decarb process. Same as before, add enough water to make sure the bud is covered but not so much that the jar floats.
Seal the instapot again and set manual high pressure for 20 minutes. When finished, let the instapot sit for an additional 20 minutes. You can then do a quick release (outside again for less smell)
Get your storage container ready and line with a strainer. You can also line the strainer with a cheesecloth. This will catch the smaller plant material.
Take your mason jar out of the pot with your oven mitts. Unscrew the lid and pour your infused oil into the strainer over the container. Let it sit for 1 minute.
You are going to want to squeeze the cheesecloth, but resist the urge!! Squeezing the cheesecloth will add the leftover chlorophyll to your oil. This is what gives your oil that really green colour and plant-like taste (and most of us don’t want that.)
Let your oil cool before placing a lid on it and refrigerating. And voila! You now have your own infused oil.
If you don’t have an Instapot, no worries, there are plenty of tutorials online and video instructions on Youtube as well. Just remember if you’re doing your decarboxylation in the oven that the key is a lower temperature for a longer period of time.
Your homemade oil will last in the fridge for 3-4 weeks. I do recommend storing your oil in a darker or more opaque storage container as natural light is not the best for your oil over time. You can also freeze your oil for up to 6 months without it affecting the potency.
When making homemade edibles, you can really use any of your favourite recipes. Just substitute with your infused fat! So, if your recipe calls for 1 cup of softened butter, use 1 cup of your softened infused butter. Just remember there may be a slight plant-like taste to your treats depending on how strong you made your carrier oil. If your recipe calls for melted butter I definitely recommend using a double boiler over a microwave. This is because melting your infused butter in a microwave can diminish your THC content and there is a risk of it converting to CBN (Cannabinol).
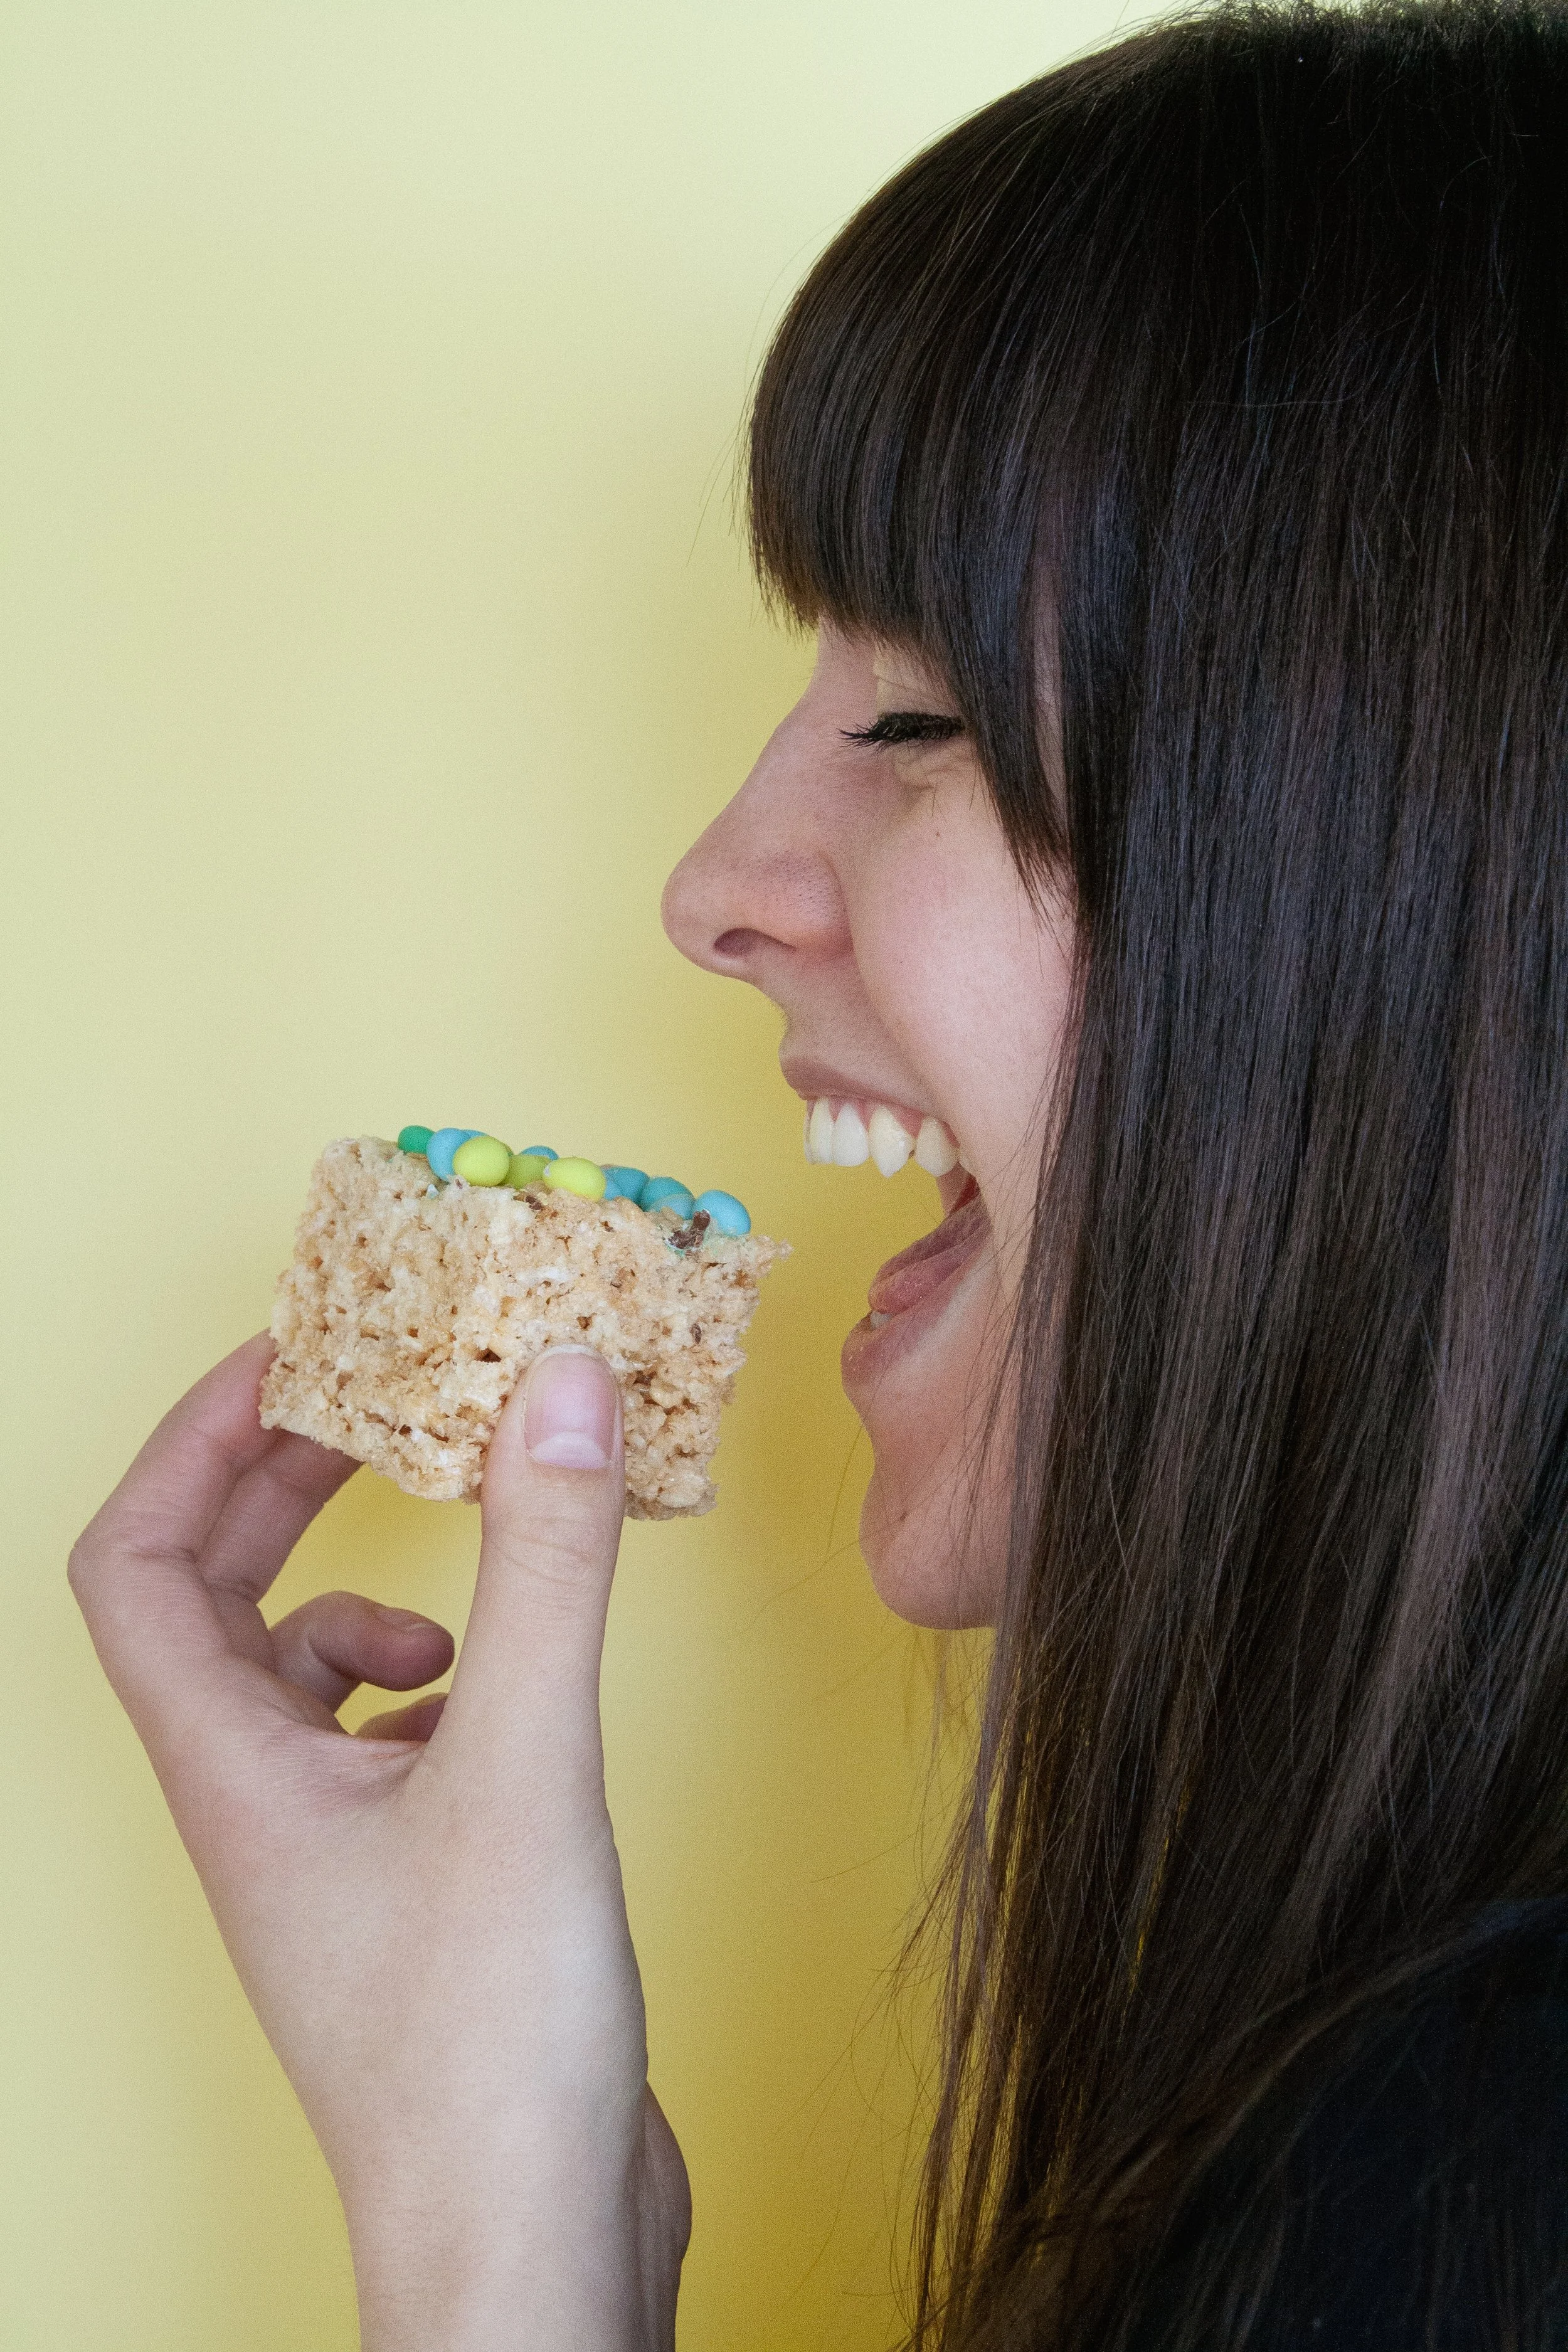
Paula’s Stoney Baloney Rice Crispy Treats!
My favourite go-to for really easy infused treats is a classic rice crispy bar. You can leave them classic, or dress them up for any occasion! Since it’s Easter I found the cutest Micro Mini Eggs and just sprinkled them across the top after the rice krispies had cooled slightly, pressing them into the top to help make sure they stayed in place for cutting. Adding little additions like that make for the cutest treats, plus chocolate also does an amazing job at helping hide that plant-like taste if you've made a fairly potent infusion.
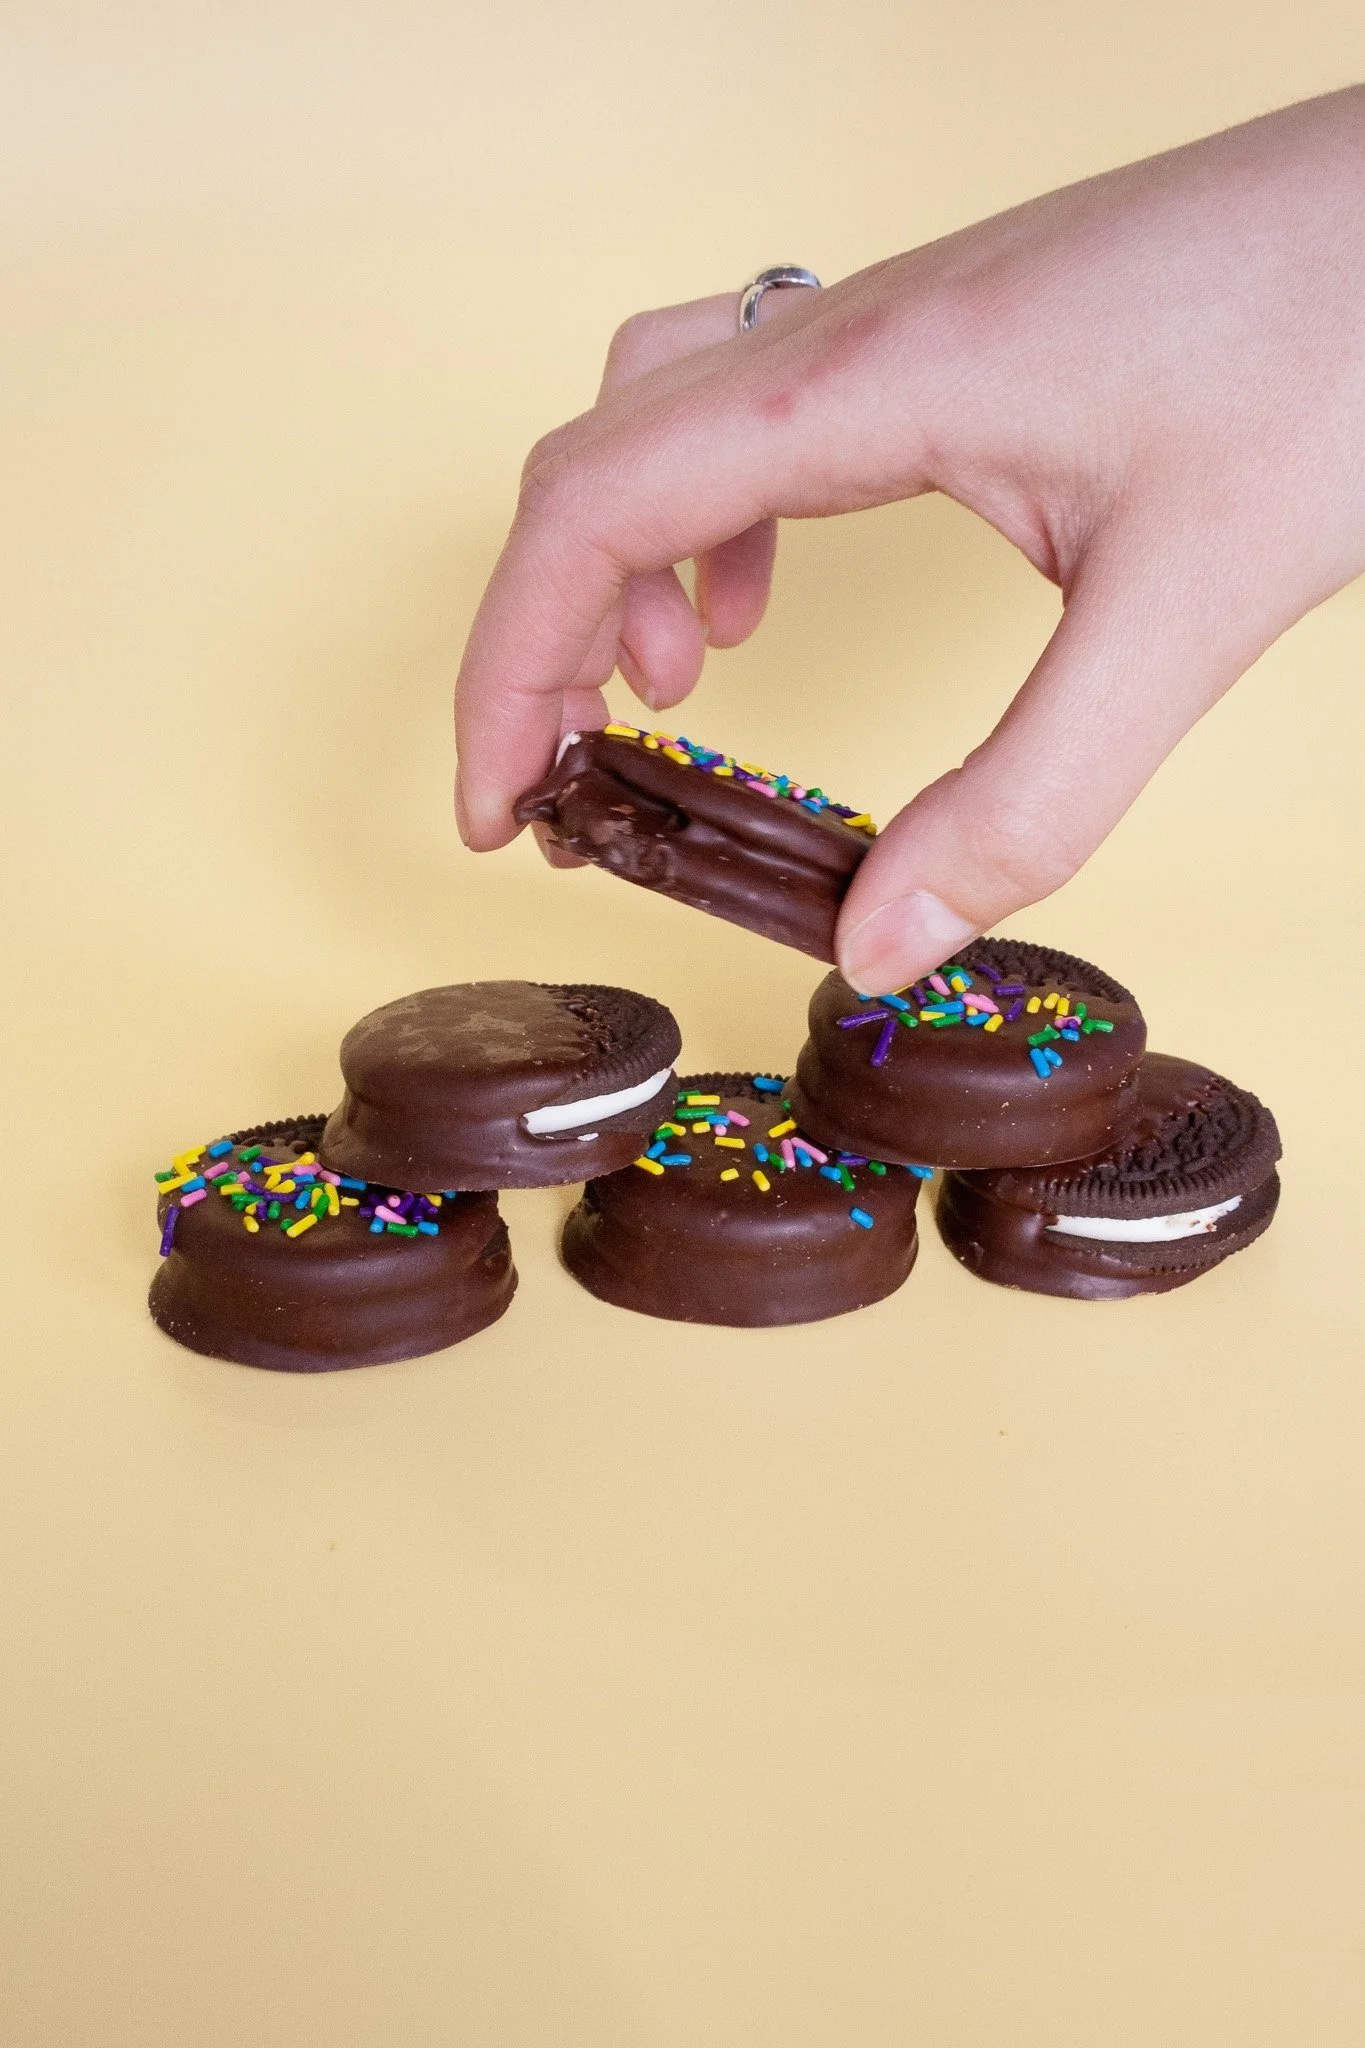
Dipped and Dazed Cookies
Now if all of the decarbing and infusing seem a little too time consuming, don’t worry you’re not alone, and there is an option for you! The recreational market has some great pre-dosed oils featuring THC and other cannabinoid-blends that you could use for some really quick no-bake treat options.
My favourite thing to do with the pre-mixed oil method is a quick chocolate dipped cookie.
For these specific cookies, I used the 30 mg THC Reign Drops, but any of the oils on the market will do.
You can do your favourite store bought cookies, I did Oreos and Great Value Chocolate Chip. I then bought some chocolate chips, but your favourite chocolate bar or any melting chocolate will do. Melt 1 cup of your chocolate and add 1 teaspoon (or 5 mL on the provided syringe) and mix. Once you have a nice smooth and fully mixed consistency, dip your cookies as evenly as possible.
There will be some quick maths to figure out dosing with the oils, but it's fairly straightforward.
I used 5mL of a 30 mg/mL THC oil. Meaning I have a total of 150 mg in my chocolate (30 mg per mL x 5 mL = 150 mg). I dipped 10 cookies to use all the chocolate, so that means each cookie is going to be approximately 15 mg of THC (150 mg ÷ 10 cookies = 15 mg).
You can adjust the amount of oil and chocolate used to make them more or less potent.
And that’s it! Super easy, no-bake edibles for when the regulated edibles are not cutting it! Hopefully this has been helpful, and I look forward to hearing all of your homemade DIY edible stories as you come visit us at the store!
Good luck and happy and safe consuming!